We're here to help! We just need a little bit of information...
What system are you using?
Have you downloaded the latest version of Lens Studio?
Please download the latest version of Lens Studio. If you still run into this issue, please come back and report it!
Is this issue causing Lens Studio to crash?
What system do you run Lens Studio on?
Version
Graphics
Follow the next steps to help us solve your issue:
-
Copy and paste this text into your TerminalCommand Window
open ~/Library/Preferences/Snap/Lens\ Studio/ %LOCALAPPDATA%\Snap\Lens Studio Copy Text
- Press ReturnEnter to run the command. The Lens Studio folder will automatically open
-
Prepare to upload your files: zip the "Log" Folder by right-clicking and choosing "compress."Locate the Log.txt file right above it.
Attach a screenshot of the issue:
Name:
Email:
What is this most relevant to?
Please enter a brief description of your issue:
Thanks for submitting this issue.
Unfortunately, it's likely due to the operating system or hardware you're using – since they don't meet the system requirements for Lens Studio.
Still, we hear you loud and clear, and are logging the issue in case there's ever a workaround we can provide!
Minimum Requirements
Operating System: Windows 10 (64 bit); MacOS 10.11+
Hardware: Minimum of Intel Core i3 2.5Ghz or AMD Phenom II 2.6Ghz with 4 GB RAM; Intel HD Graphics 4000 / Nvidia GeForce 710 / AMD Radeon HD 6450 or better; screen resolution of 1280x768 or higher
We'll try to resolve this issue as soon as possible. Thanks for letting us know about it!
Keep an eye out for a followup email from us. We may have a couple more questions for you, or we might already have a solution to offer.
Happy creating!

Absolutely! All face sprites (and normal sprites for that matter) have an alpha channel allows you to adjust how transparent the sprite will be. You might also want to adjust the blend mode of the sprite to get the colors just right.
Cheers,
Kaitlyn
Hello Kaitlyn,
thanks for your feedback.Could you give me an example for this dynamic masking functionality ? in the documentation i've seen the maskchannel but how can i paint on that mask or modify the alpha channel with a Brush for example directly?
Thank You.
Best regards
Sammy.
Hi Sammy!
You can generate a basic texture that the user can draw on by allowing them to move an object, and then feeding that result to itself so it continues to draw on top of itself.
First let's create a new camera that will render our opacity texture. In the objects panel > Add New > Camera.
Then you can get the output of this camera by going into the Resources panel > Add New > From Camera. In the pop up choose your new camera.
Then select that camera in the Objects panel, and set its input to the new camera output you created. We need a new layer so that our final camera doesn't see our brush strokes, to do this: press the layers drop down and Add New.
For now we'll set the output of this camera as our preview output so we can see what this camera sees. In the Inspector panel, choose your texture, and tick the box next to "Use as Output"
You'll notice that when you render the camera your preview is purple and black. This is because it doesn't have anything to render. Since we're making an opacity texture, where the color white will be opaque, we'll create a white texture for the camera to render in the first frame.
Under your new camera, add a Sprite. Set it's layer to Layer 1. Then give it a new unlit material. Finally move it slightly in front of the camera so it renders it.
Now we need to disable this sprite after the first frame so we can draw on top of it:
In the Resources panel create a script:
Then add this script to the Sprite object and set it to Initialized. This script will count the number of frames the Lens has run. After one frame, turn off the object that it's attached to.
Now let's make our brush. Similar to our white background: under our new camera object, in the Objects panel > Add New > Sprite. In the top right side of the Inspector panel, add it to Layer 1 so that it can be rendered by our new camera. Then, set it's transform to your desired brush size, and move the sprite so that it's in front of the camera. Finally, in the Texture field of the sprite component, add your brush texture.
Now we just need to be able to move our brush where our touch is. Take a look at the script from this guide to do this: https://lensstudio.zendesk.com/hc/en-us/community/posts/360018308143/comments/360000810363
Now we have our drawable opacity mask!
All we have to do now is apply it to whatever we want to mask out. In this case I add a billboard with a new material: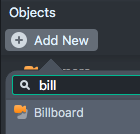
Select the new material in the Resources panel. Set it's Blend Mode to normal (so that alpha is rendered), and then tick the box next to Opacity Texture. Select the Texture field and give it the output of the camera we created previously. I gave my material the name red and colored it red for this example. In normal case you would put the texture you want to mask out, with a base texture of white.
Now set this new material as the material on your billboard:
Finally, we just need to have the orthographic camera render directly from the default camera, rather than our opacity texture camera. You should see your camera feed behind a texture that is masked!
As a bonus step, since our object will move to where ever we are touching, we can move it somewhere really far so it doesn't render in the center when the Lens first start.
So now you should be able to mask out your texture by touching the screen!
Can't wait to see what you come up with! Don't forget to share :)
Jon
Thank you very much for your instruction Jonathan, very helpful.
Thanks
Jonathan Solichin
if you can please demonstrate how u made this brush script i could get it to move but i could't exactly understand a lot of the particle script
your help is appreciated